Note: This post contains affiliate links. I may receive a commission (at no extra cost to you) if you click a link and make a purchase.
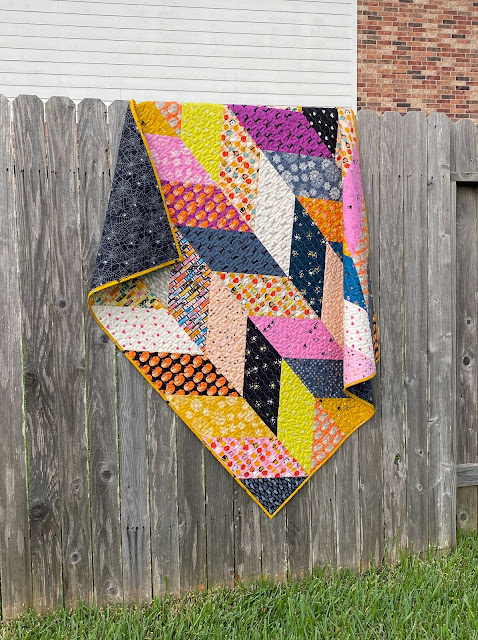
Today I'm sharing my Scrappy Herringbone quilt made with a layer cake of Spooky Darlings by Ruby Star Society. The designers of Ruby Star Society recently chose several quilters to be part of their Ruby Star Makers group and I was surprised and thrilled to have been one of them!
That means that they send me fabric from one of their new or upcoming collections and I get to make something with it and share it with you! There was a sign up list with the available fabrics and the choices went fast but I managed to snag a layer cake of their collaborative Halloween collection, Spooky Darlings.
It only took me a moment to decide what I wanted to make. I knew my Scrappy Herringbone pattern would be perfect! Why? Well, let's count the ways....
1). It does not have any background fabric. Not only does that mean that I could make the entire quilt with nothing but the layer cake (plus backing and binding, of course), but I didn't have to worry about whether or not there were going to be issues with some of the fabrics blending in with the background fabric. That is often a concern when a fabric collection has both very light/white fabrics and very dark/black fabrics plus lots of colors in between. It can be a struggle to choose a background that doesn't blend with too many of the prints, but also coordinates. With Scrappy Herringbone, that's not a problem!
2). It uses every single square of a 42-piece layer cake. Most of the time when I use a layer cake for a quilt, I have to choose some prints to leave out because I don't need them all. Sometimes that's easy, but sometimes that can be a tough decision! Scrappy Herringbone does have two size options plus two sizes of herringbones but if you make the small throw with the wider herringbones, you will be able to use 100% of one layer cake. No square gets left behind!
3). The big, simple blocks really let the prints be the stars of the quilt. Spooky Darlings has so many cute Halloween prints. Cats, ghosts, spiderwebs, witches, skulls, pumpkins, and more! You won't be cutting your cute fabrics into little tiny pieces when making a Scrappy Herringbone quilt!
Some of you may know that I'm an accountant at my day job so naturally I like balance. Random is tough for me. While this quilt (and scrappy quilts in general) can totally be made by randomly sewing fabrics together without too much thought or planning, I have a very hard time doing that. I like to make sure there is a good balance of colors, of lights and darks, that two of the same print are not touching, and so on.
I almost always mockup a quilt in my Electric Quilt 8 software before I start making it to ensure that the fabrics I plan to use will look okay (because sometimes what I imagine in my mind does not turn out the same in real life!) This quilt was no exception. A lot of times, I use EQ8 just to get an idea of what a variety of fabrics will look like overall; I don't actually determine the final fabric placement within the final quilt. I usually still do that as I'm making the quilt and put it on my design wall. This time though, I played around with the fabrics in EQ8 until I was satisfied with the fabric placement and used the digital image of the quilt as my guide as I made the real quilt.
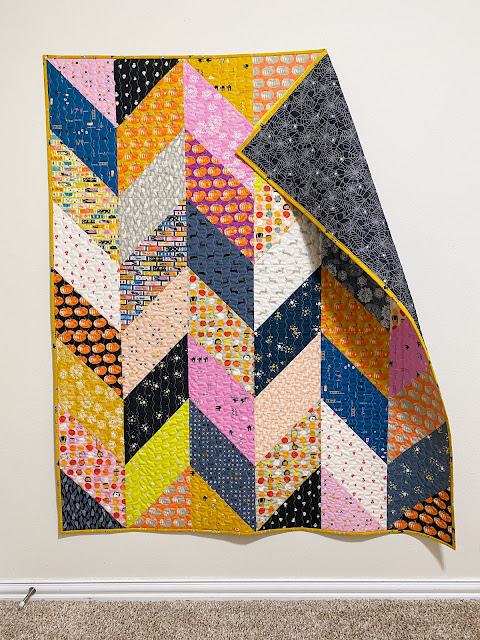
Because this quilt is smaller than what I typically tend to make (it's approximately 51" x 60"), I was actually able to get a (mostly) straight-on photo of the full quilt. I thought it would be neat to compare the digital quilt with the real thing. Below is the side-by-side comparison. Pretty close!
 |
| Digital mockup (left) vs. the real quilt (right) |
Another thing you might know about me if you've been following me on social media for awhile is that I used to have my own longarm and that it stopped working about a year ago. It has been at the repair shop that entire time. Long story short, there have been a lot of problems figuring out the problem, finding parts, etc. Based on the last update I received, it's looking more and more likely that I may never get that machine back. The repairman is not giving up quite yet, but I'm not optimistic.
The cost of a new longarm was not in the plan so I've been sending some quilts out to other longarmers and quilting some myself. My main machine is a Brother 1500, which I absolutely love for piecing (it's almost identical to the Juki that everyone raves about but with different branding). However, it only stitches straight. I think that's part of why it pieces so well but it doesn't give me many options for quilting (I have no interest in free motion quilting). I have always really loved the look of the wavy line quilting that some quilters have been doing. I recently decided to get a second machine for quilting that can do the wavy line and has a lot of throat space like my Brother.
I went with the Janome Memory Craft 6650. It's very similar to the machine that Emily Dennis uses in her wavy line stitching tutorial. I believe that mine is an older version of hers (the Memory Craft 6700) and I went with the MC6650 because it cost about half as much.
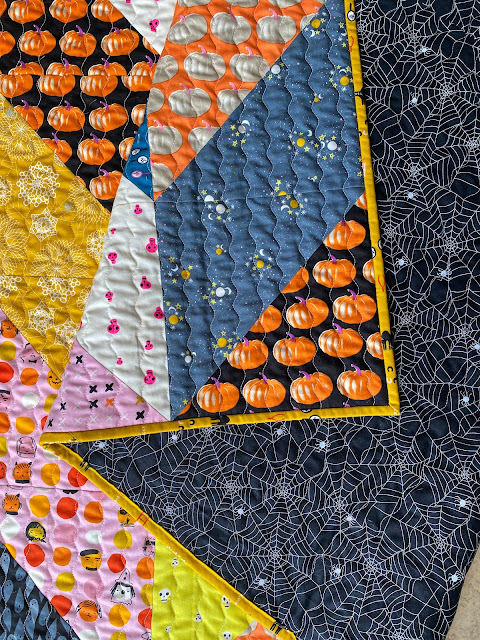
This Scrappy Herringbone is the first quilt that I quilted with my new machine and I could not be happier with the results! I started out by quilting every 2" and then going back and stitching another line between each existing line (by eyeballing it) so that I had quilting every inch. I went with vertical lines so the quilting would follow the up and down movement of the herringbones. I love the way the quilting looks on this quilt and it gives the quilt some great texture!
I did not use a Spooky Darlings print for the back. When my layer cake first arrived, the precuts were already in quilt shops but yardage hadn't arrived. I wasn't sure how long it might be (supply chain issues and all) and I knew I had a deadline for getting this quilt completed and photographed. So I chose something else instead (and of course the yardage showed up right after that!) I used the black spiderweb print from Too Cute to Spook by Me & My Sister Designs for Moda Fabrics. I think the spiderwebs coordinate perfectly with Spooky Darlings. (I linked to Fat Quarter Shop for the Too Cute to Spook line in general, but it looks like that print is sold out. They do have the orange spider web, but you might be able to find the black version somewhere else.)
For the binding, I used the mustard yellow print from Spooky Darlings that is covered in superstitions like black cats, spilled salt, and broken mirrors. Ruby Star Society had sent a yard of a couple of prints along with the layer cake and this was one of them. It's not the type of print I would normally choose for binding but I decided to give it a shot since I had it. I really like it and I'm glad I went with it instead of the solid black that I was originally planning to use.
I also added a quilt label while adding the binding. I shared a photo of my label in my previous blog post, but this time I remembered to also take a picture of the back of the label. I got these labels from Custom Labels 4 U and if you want more information, check out the blog post by Melissa Corry of Happy Quilting. I got the idea from her and she goes into a little more detail about hers. She also gives some measurements and specifics in one of the comments on that post. Mine are either the same size or very close. I ordered mine five years ago so I don't remember specifics.
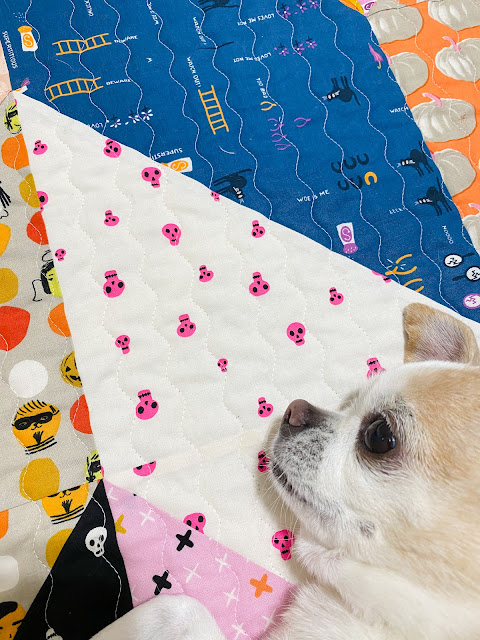
Once the quilt was completely finished it was just a matter of getting photos. My chihuahua Ripley (who is a girl; I always think Ripley is a boy's name, but that's the name she came with), is like my little shadow and she is always around, often photo-bombing my photo shoots.
Sometimes though, she does enhance the photo like these shots of her sitting on the quilt while it was draped over the back of the couch. She was definitely checking out my handiwork and I think she approved!
She seemed very comfortable on there so I made sure to tell her that I didn't make that quilt for her and that she wouldn't get to keep it. She wasn't a fan of that idea and her facial expression let me know it! :-)
If you want to make your own Scrappy Herringbone quilt, grab a layer cake of Spooky Darlings (or any other layer cake), grab the pattern from my shop, and you will have your own quilt in no time! Halloween may only be a month away but this pattern is so quick to make that you still have plenty of time!
I also have another quilt that I am making with Spooky Darlings (I actually started that one before I found out about being accepted to Ruby Star Makers) and I'm hoping to have that one finished before Halloween. Keep an eye on my social media and here on my blog to see that quilt when it's ready to share!
Until next time,
Amanda


I love the design! I’m not as much into Halloween myself but I can picture other fabric lines in this quilt. I also like the fact that there’s no waste or leftovers!!
ReplyDeleteWe must be related-I also have a very difficult time doing anything randomly!! 🤣