Note:
This post contains affiliate links. I may receive a small commission (at
no extra cost to you) if you click a link and make a purchase.
Hello! Today I'm back to show you some more of the basics of Electric Quilt 8. In my previous post, I focused on how to create a quilt top using quilt blocks preloaded in the software. If you missed it, you can find it here. Today, I am going to show you how to create your own quilt blocks.
You can start out right away with designing a block by choosing that option on the opening screen. Another option is to open the Block Worktable from the upper right area of the screen. You can get to the worktable at any time while using the software.
We will be drawing a basic pieced block, but the software also has the ability to create applique blocks. The screen likely defaults to the Pieced block, but if not, click that option on the ribbon. Next, choose Easy Draw to open up the drawing tools.
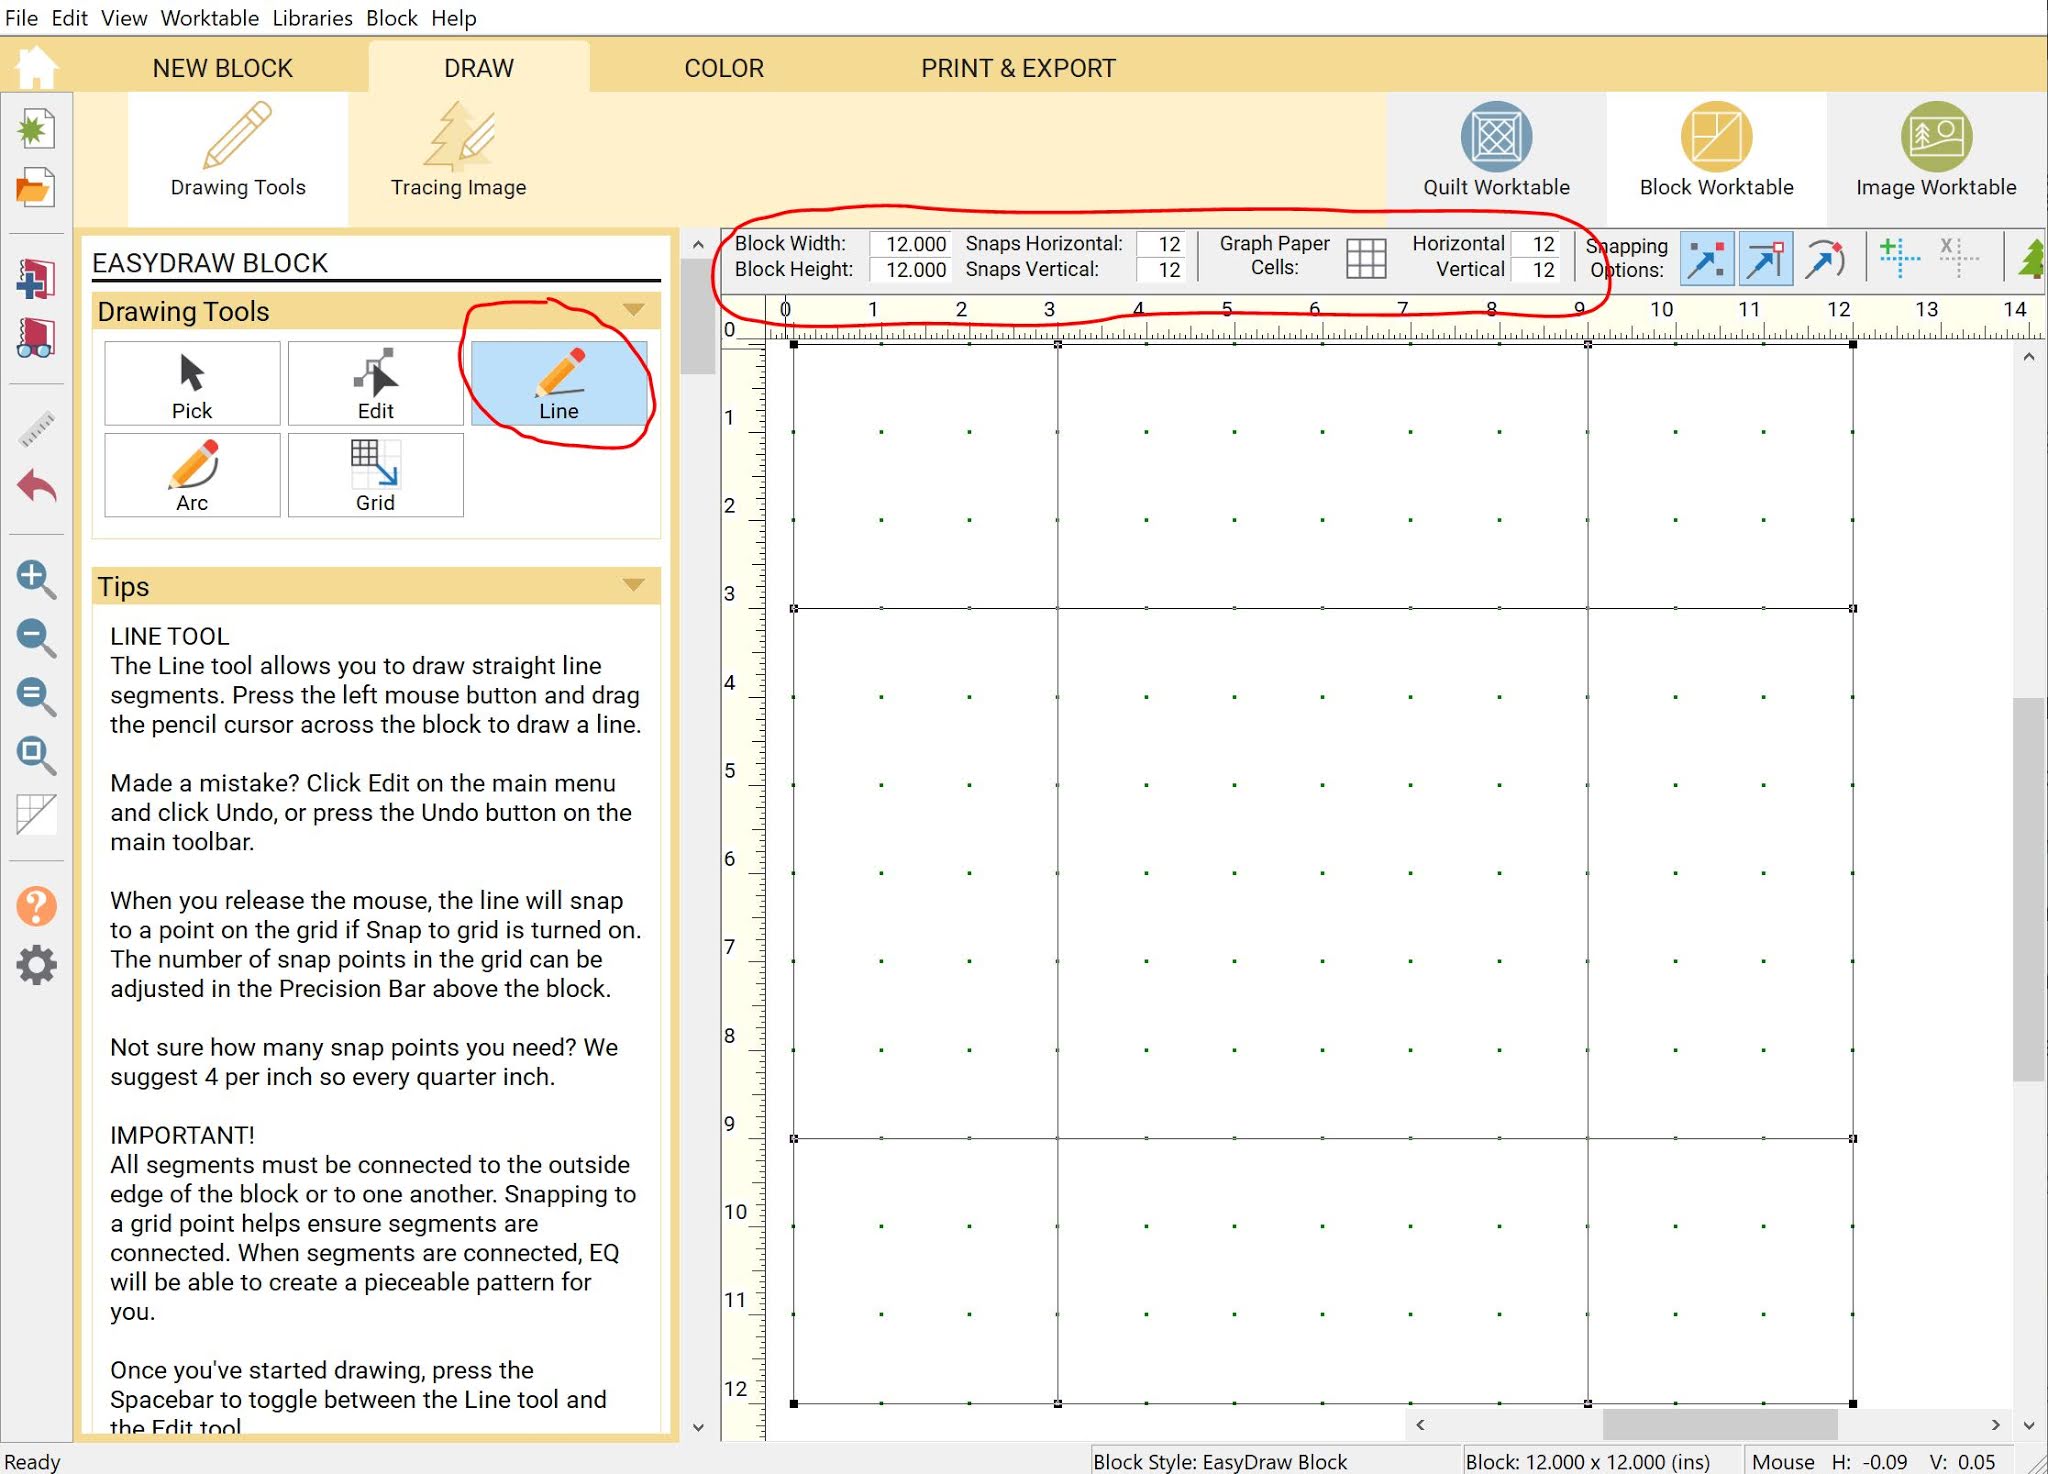
You should now see the drawing tools, as well as the block size details, as shown below. Enter the desired width and height of your block. The snaps and graph paper cells determine where the lines snap to the grid and the dots shown on the block, respectively. If my block's patches will be in full inch increments, I keep those numbers equal to my block width and height. If I will have patches that have fractions, I will want to do some math. For example, if I know I will need to draw a line at 2.5" for example, I will want the snaps at half-inch increments. If my block is 12 inches, I will want 24 snaps. To keep things simple here, we will stick with 12.
You will also see that I have already started drawing lines on my block. I did this by choosing the Line tool that is circled below. To draw, click and hold you mouse and drag each line where you want it.
I'm going to draw a simple sawtooth star. There is already a sawtooth star block that came with the software, so you wouldn't necessarily need to recreate this, but it's a simple block for demonstration purposes. I already have the main seam lines drawn, so now I just need to add in the star points, also with the Line tool.
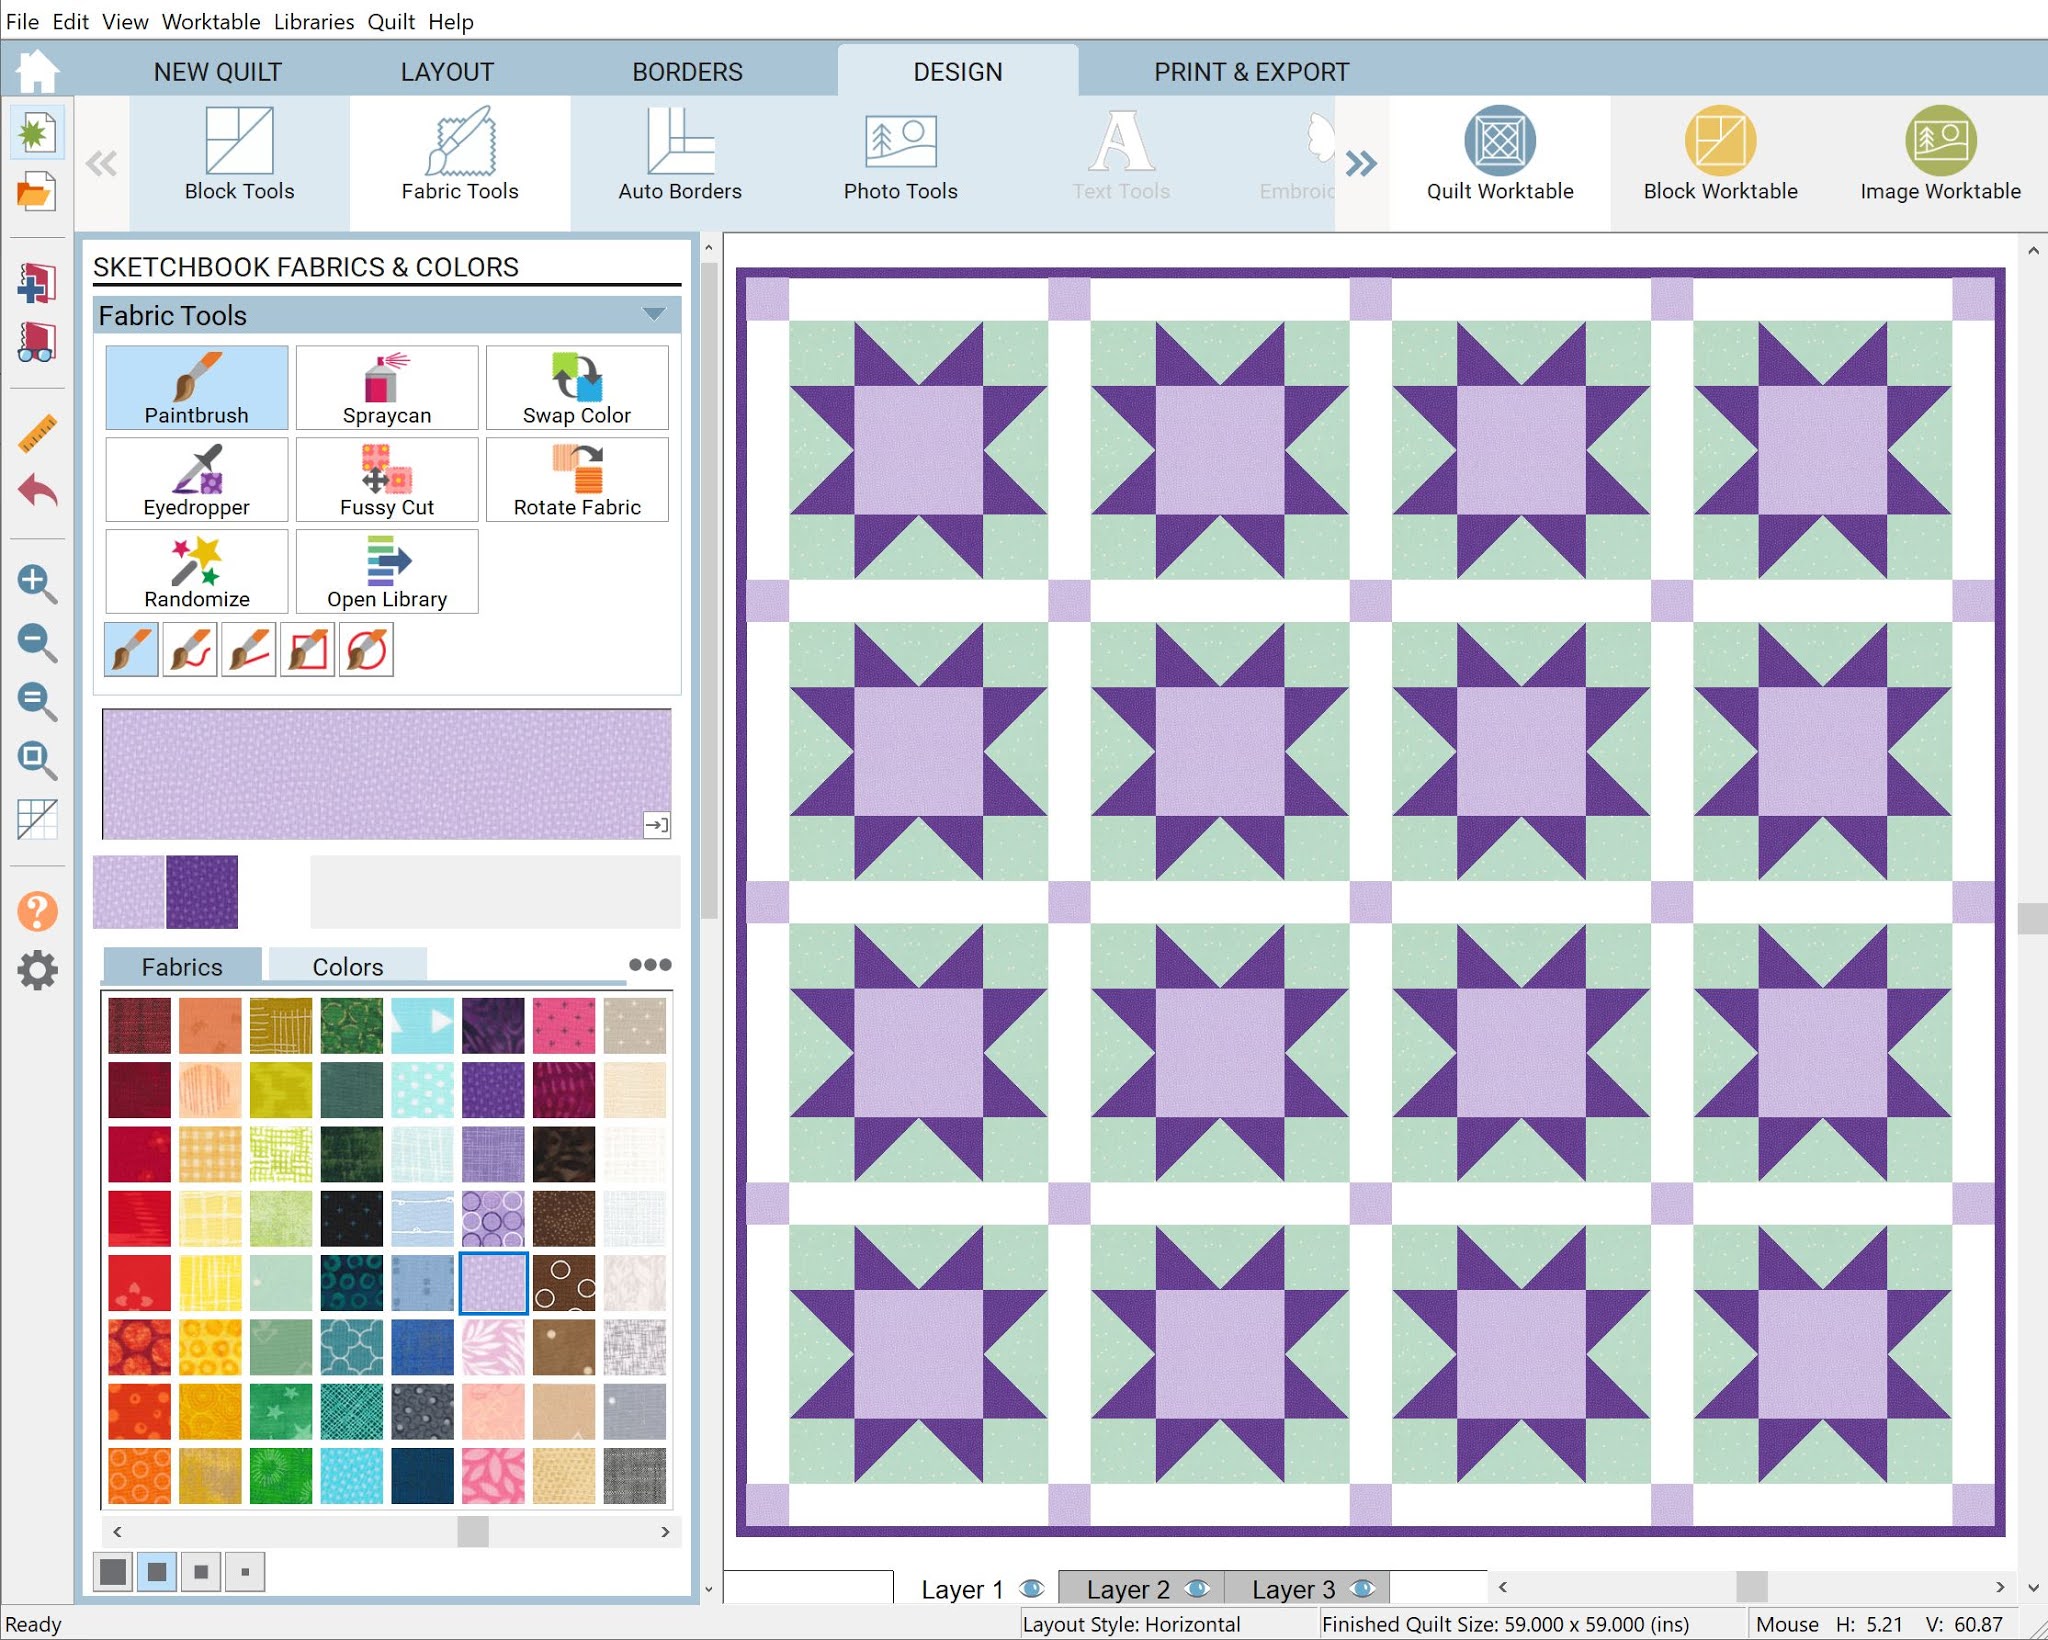
Once you have finished drawing your block, it is time to add colors and fabrics! Click Color in the ribbon and make sure that Fabric Tools is selected. Choose the paintbrush and add fabrics as desired. Make sure you add the block to your sketchbook! (If you are not familiar with the sketchbook, check out part 1 of this post.)
From this point, you can use it to create a quilt as described in my previous Basics post. Click Quilt Worktable in the upper right area of the screen to get back to the quilt top tools.
That wraps up my basic preview of EQ8. I hope it was helpful! Be sure to check out my other EQ8 posts where I'll be showing you how to add your favorite fabrics, some tips for editing and coloring your designs, and some easy design tips!
If you've decided you're ready to get your own copy of EQ8, you can find it in the Electric Quilt store.
Until next time,
Amanda


No comments:
Post a Comment